
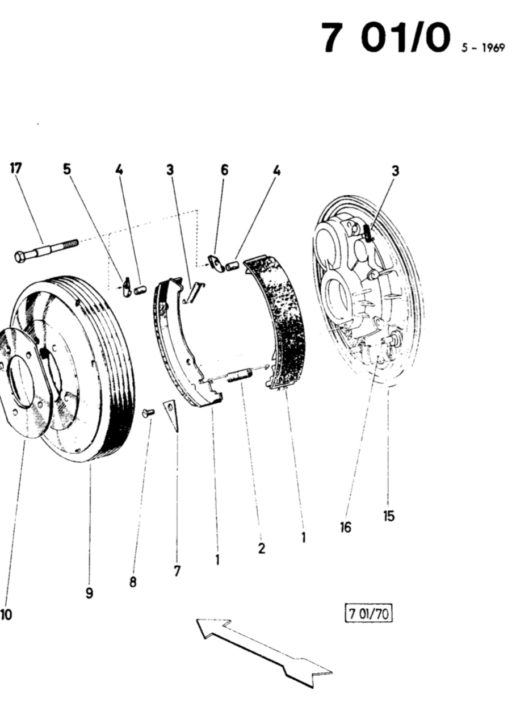
Brakes
The vehicle pulls on one side, the braking effect has decreased, the main examination has not been passed. Are the wheel brake cylinders fixed? Are the brake pads oiled or worn? Let’s take a look at the braking system.

Does brake fluid run out of the wheel brake cylinder? How do I get the small holding spring reassembled? What brake pad strength do I need? We want to address these issues in this article.
Thank you for the cooperation, tips & tricks to Walter, Andre and Rene.
Work effort: 3-6 hours
Material: 100 – 300 – 500 Euro
Tool: standard and some flower wire
Repairing the brakes on the front axle
Warning
Brakes are safety-relevant components and may only be serviced and repaired with good expertise. This manual is intended to provide assistance only for the special features of the Hafling
er. Brake pads can be asbestos-containing. In any case, the brake abrasion contains fine dust and only dust mask of filter class P3 should be used.
Tool:
- Keys for wheel nuts
- Screwdriver flat, for hanging the springs
- Wrench SW 17 and 10, for replacing the wheel brake cylinder
- Wrench SW 9 or 19 for eccentrics (depending on version)
- Ring wrench SW 7 for the vent screws
- Approx. 1m winding wire (also partly called flower wire) with maximum diameter of 1mm (there is in the flower shop) and a chopstick. For hanging the feathers
- Possibly schonhammer for driving out the wheel brake cylinders
Material: (as of Nov. 2018)
- New copper seals for the brake line
- Brake caliper grease or comparable
- If desired, blue Ate brake cylinder paste
- Wheel brake cylinders (still available)
- Brake jaws (are no longer available)
However, there are dealers in Germany and Austria who offer brake jaws in exchange and there are various companies that re-occupy worn jaws. The current drum diameter is extremely important, as the brake jaw radius must match the drum radius. Observe also the wear dimensions of the drum from the repair instructions! Whe
n selecting the repair operation of the coating, care should be taken to ensure that the jaw is treated with rust protection. So with diving glue or paint. - Feathers are available in the classic car retailer or two relevant Steyr Puch dealers
Sources and parts of the wheel brake cylinders:
Front axle 22 mm e.g. RTD R22071
Rear axle 15.7mm e.g. ATE 03.3215-0221.3, also RTD R1502P1 or Metelli 106
Procedure front axle
In any case, the workshop manual should be available. The steps described here are only briefly mentioned here.
Removal of the brake drum
- Jack up the vehicle. If both brakes of one axle are repaired, the Haflinger can be supported on the central tube
- Remove wheel
- Remove the brake drum. It’s usually very easy.
If the brake drum is difficult to remove, the pads are probably in the drum, so a clear edge has been created. Then turn the eccentrics inward to create more space. Treat eccentrics from the outside with creep oil or rust releaser. In this case, the drum must be turned off or replaced
Removal of brake jaws
- Press both upper retaining springs with a flat screwdriver from the front through the brake jaw and hang out. The springs can usually get stuck
- Remove a brake jaw at the bottom of the wheel brake cylinder seal and fold forward
- Remove the second brake jaw and remove both jaws together with the spring
Removal of wheel brake cylinders
- Vacuum old brake fluid from container, insinuate the vessel or tub, release the brake line
- Loosen retaining screws M6
- Remove the wheel brake cylinder. Possibly carefully expel from behind with the hammer
Intermediate work
- Check brake jaws for wear, replace or have them repaired if necessary. The surface thickness must match the diameter of the brake drum. Also check the carrier material for inlet marks at the support points (upper bearing). The lower flag in the wheel brake cylinders must be straight.
- Check the wheel brake cylinder. No liquid must leak. Replaced if necessary.
- Cleaning the entire brake carrier. In particular, the mounting surfaces for the wheel brake cylinder.
- Check the upper bearings of the brake jaws for smoothness and treat them with brake caliper grease. The bearings can be rotated.
- Check eccentrics for smoothness and treat them with creep oil
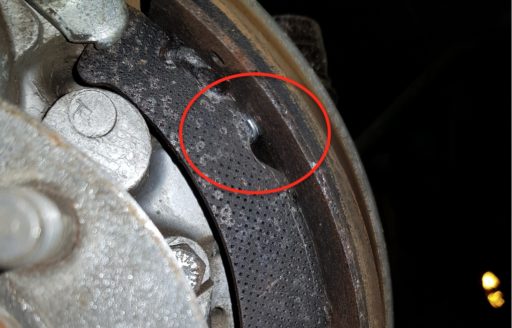
- Control of the small oil guide plate on the outside of the wheel carrier. It must point straight down and must not be bent inwards. The sheet metal prevents any leaking gear oil onto the brake surface.
- visual control of the joints and ensure sufficient fat.
- Brake carrier completely degreased
- Lightly treat friction surfaces for the brake jaws with brake caliper grease if necessary. This is where the screwdriver ghosts diverge. On the one hand, grease does not belong in the brake, on the other hand, the moving parts are therefore smoother.
Preparation of the wheel brake cylinders
The wheel brake cylinders are delivered easily oiled and can be easily installed.
The dismantling of the wheel brake cylinders and grease of the brake pistons with, for example, blue Ate brake piston paste increases the service life of the wheel brake cylinders. When disassembled and assembled, there is a risk that the sealing lips or dust caps will be damaged.
The screwdriver experts do not agree on which method is better. You decide lifetime against risk of a leak, everyone has to decide for themselves. I myself removed the dust cap and applied the brake paste without removing the piston. Then put the cap back on.
Installation of the wheel brake cylinder
- Set the eccentrics to 12 o’clock and then turn an eighth turn inwards towards the wheel brake cylinder. This gives you more space for the wheel brake cylinder compared to the position on the very inside and you can hang the jaws right away.
- The flange or Treat the cutting surface of the wheel brake cylinder and the passage to the anchor plate with brake caliper grease. Copper paste is unsuitable at this point, as it bakes very firmly over time. Use normal fat.
- Screw on the brake line (seals replaced)
Installation of brake jaws
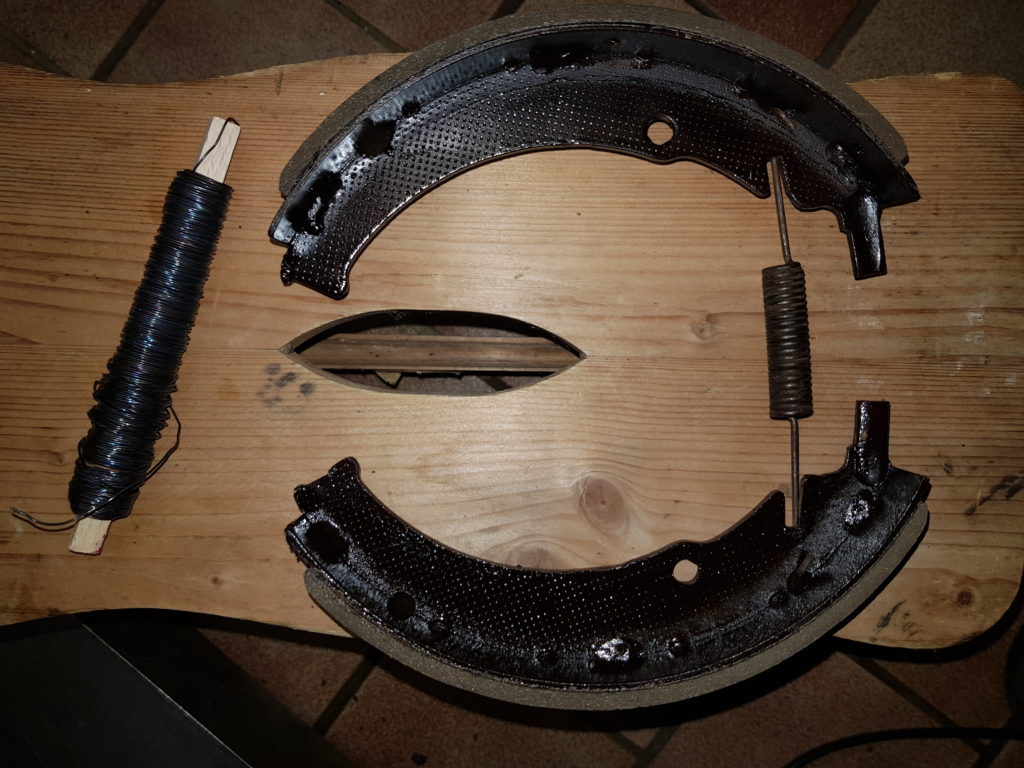
- Connect the brake jaws to the clamping spring. The spring is located between the covering and the anchor plate.
- Insert the jaws INTO the dust caps of the wheel brake cylinder one after the other. Do not damage dust caps! Place the top end of the jaws before the bearing.
- Form a loop from the winding wire and connect it with a
rod as a pull handle (wood). So just wrap it often. - The jaws fold slightly forward, guide the wire loop through the hole and hang the upper holding spring into the wire loop.
- Place the brake jaw in the upper bearing.
- Pull the holding spring with the wire loop through the hole and hang it into the brake jaw.
- The second cheek as well.
- Check everything again.
Installation of the brake drum
- brake drum.
- Mount the wheel and tighten it.
- Set eccentrics. A very light grinding noise should be heard.
- Brakes vent (with vent or with pumps on the pedal). Whe
n venting without a vent, make sure that the brake pedal is not moved beyond the usual pedal path! In the main brake cylinder, the surfaces are very smooth due to constant use. If the piston is pushed outside this area on rough surfaces, this usually results in a leakage.
Test driving and braking
New brake pads do not have the full braking power at the beginning! The driving style must be adjusted accordingly until the pads have sanded onto the drum.
If you have the option (truck workshop nearby) you can have the brake jaws turned off in a built-in condition with the radius of the drum. Then the brake immediately wears on the entire surface and you have a very good braking effect.


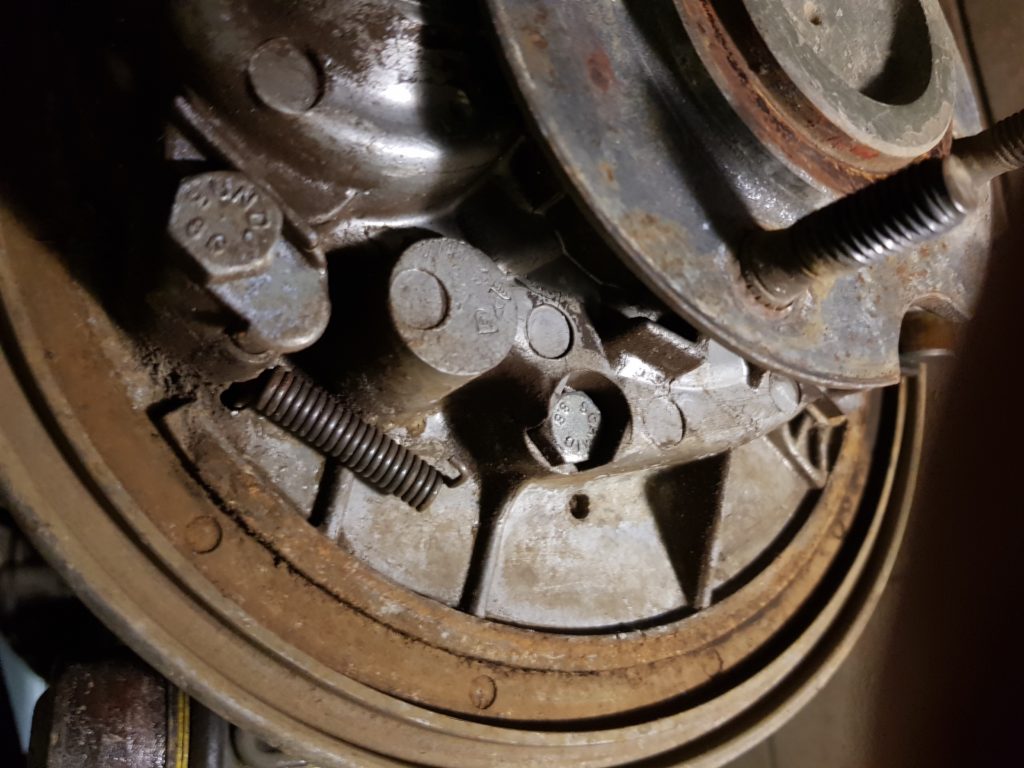
Excenter in arrow direction TO 
Return spring hung 
Small spring in anchor patty 

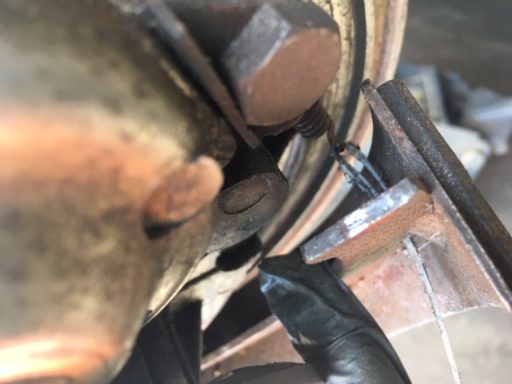
Train loop in position 

Small spring in end position

Repairing the brakes on the rear axle

Here will be some special features to follow soon, in particular on the subject of handbrake and its setting.